Groundworks Explained: The Excavation Sequence Self-Builders Need to Supervise Before the Walls Go Up
A set of plans can tell you a house will sit on a basement, a crawl space or a simple slab. What it will not tell you is how the ground underneath gets opened up safely to receive that foundation. Foundation type and excavation method are two separate decisions, made at different moments, often by different people — and self-builders who only read the foundation drawing can miss the part of the job that actually determines whether the structure sits well for the next fifty years.
This guide walks through that excavation sequence: what determines the method, why the last few centimetres of digging matter more than the rest, and how groundwater turns a straightforward dig into a fight against mud if it isn't planned for. One honest caveat upfront: exact permit procedures, utility-locate steps and soil rules are set at commune and regional level and vary by project. Check those with your local administration before you check anything in this article.
Key Takeaways
- Foundation type (slab, crawl space, basement) describes the finished structure; the excavation method that gets you there is a separate, site-specific decision shaped by access, soil, neighbouring structures and groundwater.
- The soil left at the very bottom of the excavation carries the load of the whole foundation, so repeated machine traffic, rain-softened mud or loose backfill at that level compromises bearing before a single wall goes up.
- A dry test pit on one day proves nothing about what the site does after rain, snowmelt or a seasonal rise in the water table.
- The spoil pile from your own dig is not automatically good backfill — unsuitable material often has to be separated out or trucked away, and clean fill brought back in.
Foundation Type vs. Excavation Method: Why They're Two Different Decisions
It helps to separate what the foundation plan shows from what the excavation crew actually has to do on site. The finished foundation — basement, crawl space, slab-on-grade, strip footings on a pier-and-beam frame — is a design choice. The excavation method used to get there is a site-management choice, and it depends on things the architectural plan rarely mentions: how much access the plot gives, what sits next door, whether there's an existing foundation nearby, where the groundwater sits, and whether the digger hits rock.
A rough way to see the split:
| Foundation type | Typical excavation approach | What mainly governs it |
|---|---|---|
| Slab-on-grade | Site levelling, debris clearance, shallow strip | Surface conditions, minor grading |
| Crawl space | Shallow, wider trench or pad excavation | Soil bearing near the surface |
| Basement | Deep, large-scale excavation, often with big machines | Groundwater, soil stability, access for machinery |
| Strip footings near a boundary | Narrow trench, sloped or shored sides | Neighbouring structures, available width |
The table only holds for typical cases. The same foundation type can need a completely different excavation approach once the plot, the soil or the neighbours change — which is exactly the point of the next section.
What Actually Determines the Excavation Method on Your Plot?
Two houses with the same foundation drawing can get two very different excavation bills, and soil is usually the reason. Soil type affects how much weight it can bear, how stable a cut stays while it's open, how water moves through it, and how fast a machine can actually dig it. None of that is fixed across a single plot either — conditions can change from one corner of a house footprint to the other, which is why a contractor's quote for your site won't necessarily match your neighbour's.
Before digging starts, the site normally gets reviewed for soil type, the location of underground utilities, and the slope of the land, with a plan that sets out dig depth and width, drainage, trench support and how equipment will get in and out. On larger or riskier projects, that review can extend into a proper geotechnical investigation: borings, test pits, penetration testing, groundwater observations and laboratory classification of the soil, feeding into recommendations on bearing capacity, excavation support, fill and compaction.
Not every self-build needs the full version of that investigation — the scope is normally matched to the size and risk of the project, not applied uniformly. A simple single-storey extension on known, stable ground asks far less of a soil survey than a deep basement next to an existing building. What matters for a self-builder is knowing that this review exists as a distinct, biddable step, separate from the foundation design itself, so it doesn't get skipped or assumed.
The Narrow-Lot Problem: Why Belgian Infill Plots Rarely Get a Simple Sloped Cut
The cheapest way to dig a safe hole is usually to slope its sides back, so the soil holds itself up without extra support. That needs room — space for the cut to widen as it goes down. On a generous rural plot, that's rarely a problem. On the narrow, deep infill lots and terraced plots common in Belgian self-builds, it often is: the property line, the street, a neighbouring house, a septic system or a mature tree can all sit close enough to the proposed foundation that there simply isn't room to slope the cut back.
When sloping isn't possible, shoring takes its place — vertical support systems that hold the excavation walls in place instead of laying them back. Shoring becomes more likely whenever the dig is deep, groundwater is present, access is tight, or a neighbouring footing, road, retaining wall or utility line sits inside the zone the cut would disturb. That kind of system can call for a structural or geotechnical engineer, and sometimes permission to install anchors that cross beyond the property line — on a Belgian plot, this kind of permission is not something a contractor can simply decide on site, and the right route (commune, surveyor, agreement with the neighbouring owner, or a combination of these) needs confirming locally rather than assumed from general practice.
Tight access changes the work itself, too. Instead of one efficient excavator moving soil in big bites, a restricted plot often forces a chain of smaller machines, conveyors, wheelbarrows or hand labour, because gate width, overhead wires, neighbouring buildings, tree canopies, driveway capacity and turning space all cap how big a machine can be brought in. That's a direct reason why a quote for a tight urban self-build can run higher than the same square metres of excavation on an open site.
The Groundworks Sequence: Three Phases You Can Actually Supervise
A contractor's internal excavation workflow runs to a long list of steps. For a self-builder standing at the edge of the hole, it's more useful collapsed into three phases, each with one thing worth personally checking.
Phase 1 — Before Digging. The design is confirmed, the site has been reviewed for soil, slope and underground services, and the paperwork — permits and utility locates — is in hand. Exactly which permits and which utility-locate procedures apply is a local matter that varies by commune and region; confirm it directly rather than assuming it matches a general description. What to check yourself: ask to see that the utility locate has actually happened, not just been requested, before the machine arrives.
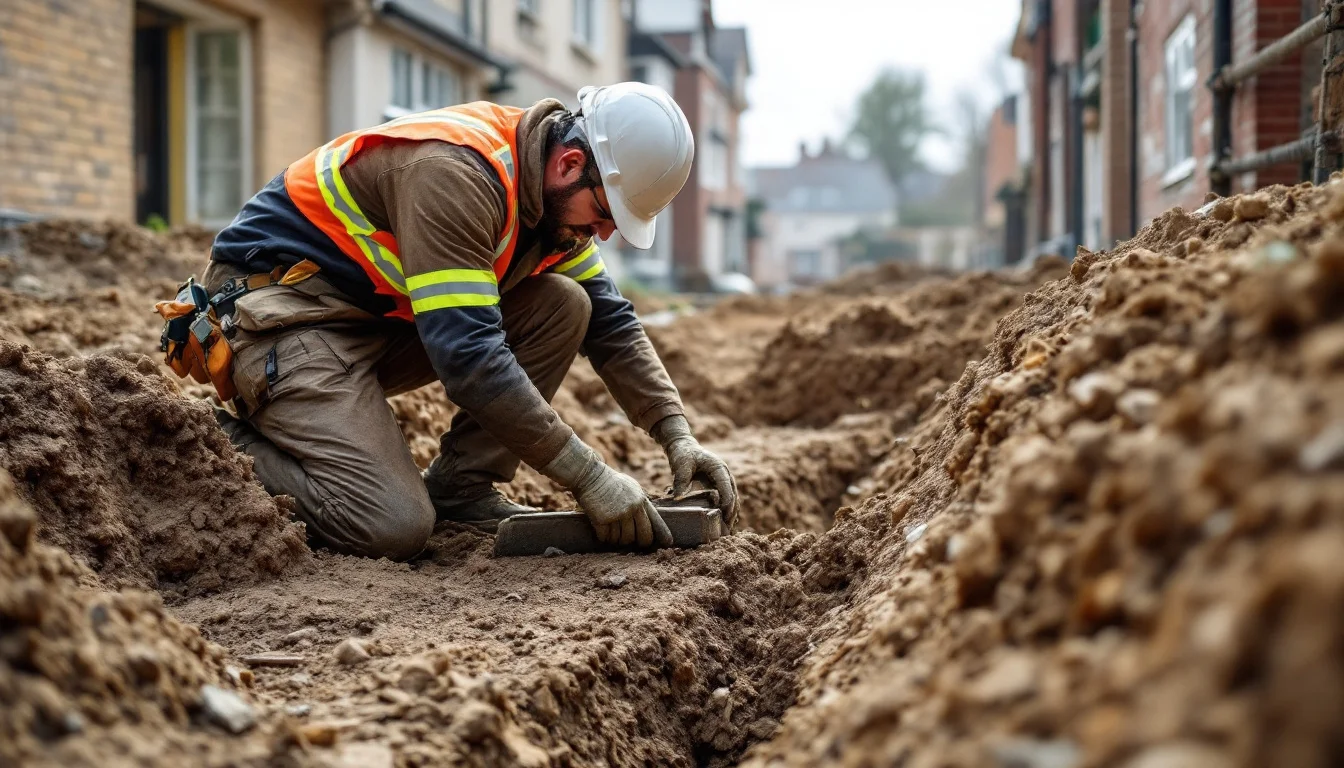
Phase 2 — During the Cut. Excavation proceeds in a planned sequence rather than all at once to final depth. Where practical, the machine keeps the bottom slightly above the final design level until the very last pass, which is done in a controlled way. What to check yourself: ask to be told, or ideally be present, when the exposed subgrade is inspected — this happens before any stone, mud slab, formwork or concrete goes in, and it's the one moment the bearing surface is actually visible.
Phase 3 — After Digging. Backfill goes in around the finished foundation walls in controlled lifts, using suitable material and equipment chosen not to damage the fresh walls, drains, waterproofing or insulation. The sequence finishes with rough and final grading, shaping the surface so water runs away from the foundation and restoring any drainage paths the works disturbed. What to check yourself: ask what material is being used for backfill, and confirm the final grading slopes away from the house, not towards it.
The Critical Inches: Why the Last Part of the Dig Matters Most
Everything above the final few centimetres of an excavation is, in a sense, just moving earth. The last part is different, because it's the soil the footing will actually sit on. The footing transfers the weight of the whole building down into whatever is left at the bottom of the hole — which is why repeated machine traffic over the same spot, rain-softened mud, or loose backfill dumped in at the base all weaken the bearing surface before anything has been built on it.
The trench bottom needs to stay at the design elevation, and any soil that's gone loose, soft, frozen or otherwise disturbed has to be dealt with before concrete goes in. One detail is worth remembering precisely: random over-excavation — digging too deep by accident — is not fixed by shovelling loose soil back into the hole. Loose fill compacts unevenly under load, and unevenness at this stage shows up later as cracks or uneven settling.
This is also the one part of the job a self-builder can genuinely verify. Once concrete is poured, the bearing surface disappears from view for good. Asking to see — or even just asking for photographs of — the exposed subgrade before the pour is the highest-value check available at this stage, because the bearing surface is visible only once.
Water and Drainage During the Dig
Water does more damage to an open excavation than almost anything else on a site. It softens the bottom — the very bearing surface described above — erodes soil out from under adjacent footings, and increases the pressure pushing against any shoring in place. A workable cut can turn into unstable mud within hours of rain.
That's why dewatering works better as a planning decision than as an emergency response. Contractors commonly plan for it ahead of time with gravel layers or trench drains, and keep a sump pump ready, rather than waiting to discover a high water table mid-dig — a site without that preparation can stall quickly once water starts moving in. Erosion at the edges of the dig is usually kept under control with simple measures: small retaining structures, leaving vegetation in place where it isn't in the way, and sediment controls such as silt fencing placed downslope to catch soil particles already carried off by runoff.
The assumption worth retiring is that a dry site visit settles the question. A test pit that's dry on the day you looked at it says nothing about what happens after a week of rain, a spring snowmelt, or a seasonal rise in the water table. Groundwater behaviour needs to be assessed across conditions, not on a single afternoon.
Backfill and Final Grading: Closing the Groundworks Phase
There's a common assumption that the pile of soil sitting beside the hole is free backfill, ready to go back in once the foundation is built. It usually isn't, or not all of it. Topsoil, wet clay, organic material, construction debris, oversized rock and anything contaminated may need to be separated out or hauled away rather than reused, and clean granular fill sometimes has to be bought in and brought to site even while a large spoil heap still sits there.
Once suitable material is confirmed, foundation walls get backfilled in controlled lifts — placed and compacted in stages rather than dumped in all at once — using equipment chosen so it won't damage the fresh walls, drains, waterproofing membrane or insulation underneath. Getting this step wrong doesn't usually show up immediately; it shows up as damp, cracking or drainage problems well after the walls above are finished and the site has moved on.
FAQ
How deep does an excavation need to go for a slab compared with a basement? It scales with the foundation type. A slab foundation still requires genuine groundwork — typically stripping the topsoil, laying and compacting a sub-base, and often digging perimeter trenches or stiffeners down to frost depth — but it stays shallower overall than a crawl space. A crawl space goes somewhat deeper. A full basement needs much deeper excavation, usually with larger machines, because the whole living space below ground has to be opened up rather than just a shallow footing zone.
What happens if the excavation ends up too shallow or too deep? Either error carries consequences later rather than immediately. Going too shallow or too deep risks uneven settling, cracking and drainage problems once the building is loaded and finished — problems that tend to surface months or years after the walls are up, not during construction itself.
What should I ask for as proof that the subgrade was inspected properly? Ask the contractor for photographs or written notes taken at the subgrade-inspection moment, before stone, formwork or concrete goes in. This costs nothing to request and leaves a record that outlives the dig itself, since the bearing surface disappears from view permanently once concrete is poured.
Conclusion
The real output of groundworks isn't the hole in the ground — it's a bearing surface that someone has actually looked at before it disappeared under concrete, and a water strategy built to survive more than one afternoon of weather. Permit conditions, utility-locate procedures and soil rules still sit outside the scope of this guide and need separate confirmation with the commune and, where relevant, the region — the technical sequence described here is only half the job.